

Satur(n)day practice #1: setup, approach, and launch of your first astrocartography map (+informational resources)
Saturday (Saturn Day) Practical Lesson, 20th of September 2025
Once you familiarized yourself with the basics of astrology in the previous lesson, it’s time to open your first astrocartography map if you are a beginner! Astrocartography definitely opens a whole new unique dimension in the practice. For those new to this field, the prospect of creating and reading a map can feel daunting. This guide will walk you through the setup, approach, and launch of your first astrocartography map, step by step, with clarity and practical guidance. This lesson is not related to how to read yet, just the step on how to prepare everything correctly + useful informational resources that can come in handy.
Learning goals of this lesson
Understand the importance of precise birth data for astrocartography and how even small inaccuracies affect planetary lines
Learn how to gather and verify accurate birth information, including date, exact time, place, and time zone
Explore the concept of rectification for cases where official birth records are unreliable
Discover the different tools available for mapping free online options + paid
Learn why precision matters in plotting planetary lines and angles, and how small errors can change insights
Understand the four key angles (Ascendant, Descendant, Midheaven, Imum Coeli) and how they anchor planetary lines on the map
Develop skills in visual memory and spatial awareness of planetary lines by using colors, labels, and key angle markers
Build confidence in launching your first map, so you don’t get overwhelmed when you see it anymore
Learning the formula for a quick removal of confusion when seeing all of the lines on the map
PRACTICE: boost your visual memory by copying all planetary lines and angles onto a larger piece of paper
Step #1: gather accurate birth information
As learned in the previous lessonn astrocartography begins with the most fundamental piece of astrology: your birth chart. Without a precise chart, the map will not hold. While natal astrology can sometimes tolerate a slightly rounded birth time, astrocartography has no such flexibility. Planetary lines are highly sensitive, and even a shift of a few minutes can change their position on the globe. This is why gathering accurate birth information is the non-negotiable first step.
The date anchors your chart in time. With the day, month, and year in place, software of preference can calculate planetary positions for that moment. This part is straightforward, but it’s worth double-checking details, especially if your birth certificate uses a different calendar system (for example, Julian vs. Gregorian in some regions historically). For most modern births, the recorded date is accurate, but if you come across discrepancies in family stories, always confirm with an official document.
In some cases, even official documents can be inaccurate (this is my personal experience). My birth certificate records 11:25 AM, but in reality I wasn’t born until 9:05 PM. Fortunately, my mother noted the exact moment I took my first breath. She remembered looking at the clock directly in front of her and, just as clearly, hearing the start of a televised Bingo program playing outside the room.
Years later, I cross-checked this memory against the TV schedules from that period, and everything aligned with her account. The timing turned out to be key: If I was born only two minutes later, my Ascendant would have shifted from 29° Cancer to 0° Leo which is a subtle but quite a significant change that would have altered my chart entirely.
Without my mothers story, as an astrologer, I would probably figure out that my rising isn’t in Capricorn (first through the constitution of my body and presence - I look way younger for my age which is quite the opposite for Capricorn rising), and the planetary positions wouldn’t match my transits, and finally my astrocartography lines and experiences wouldn’t match as well at all (which is already clear here, as with that birth time, I would be living on my Sun MC line which is on the other side of the world of my birth place). In this case it would be necessary for me to get a rectification done. Rectification is when an astrologer works backwards to uncover your true birth time. If the exact moment isn’t written down or the records are unreliable, the astrologer studies key events in your life and matches them with the timing shown in transits, progressions, and other traditional methods. Through this process, they narrow down the birth time to the most accurate moment possible, giving you a solid foundation for natal work and astrocartography.
Some people experiment by generating maps with a range of possible birth times (for example, between 2–3 p.m.) to see how lines shift. This does not replace rectification but gives a sense of sensitivity.
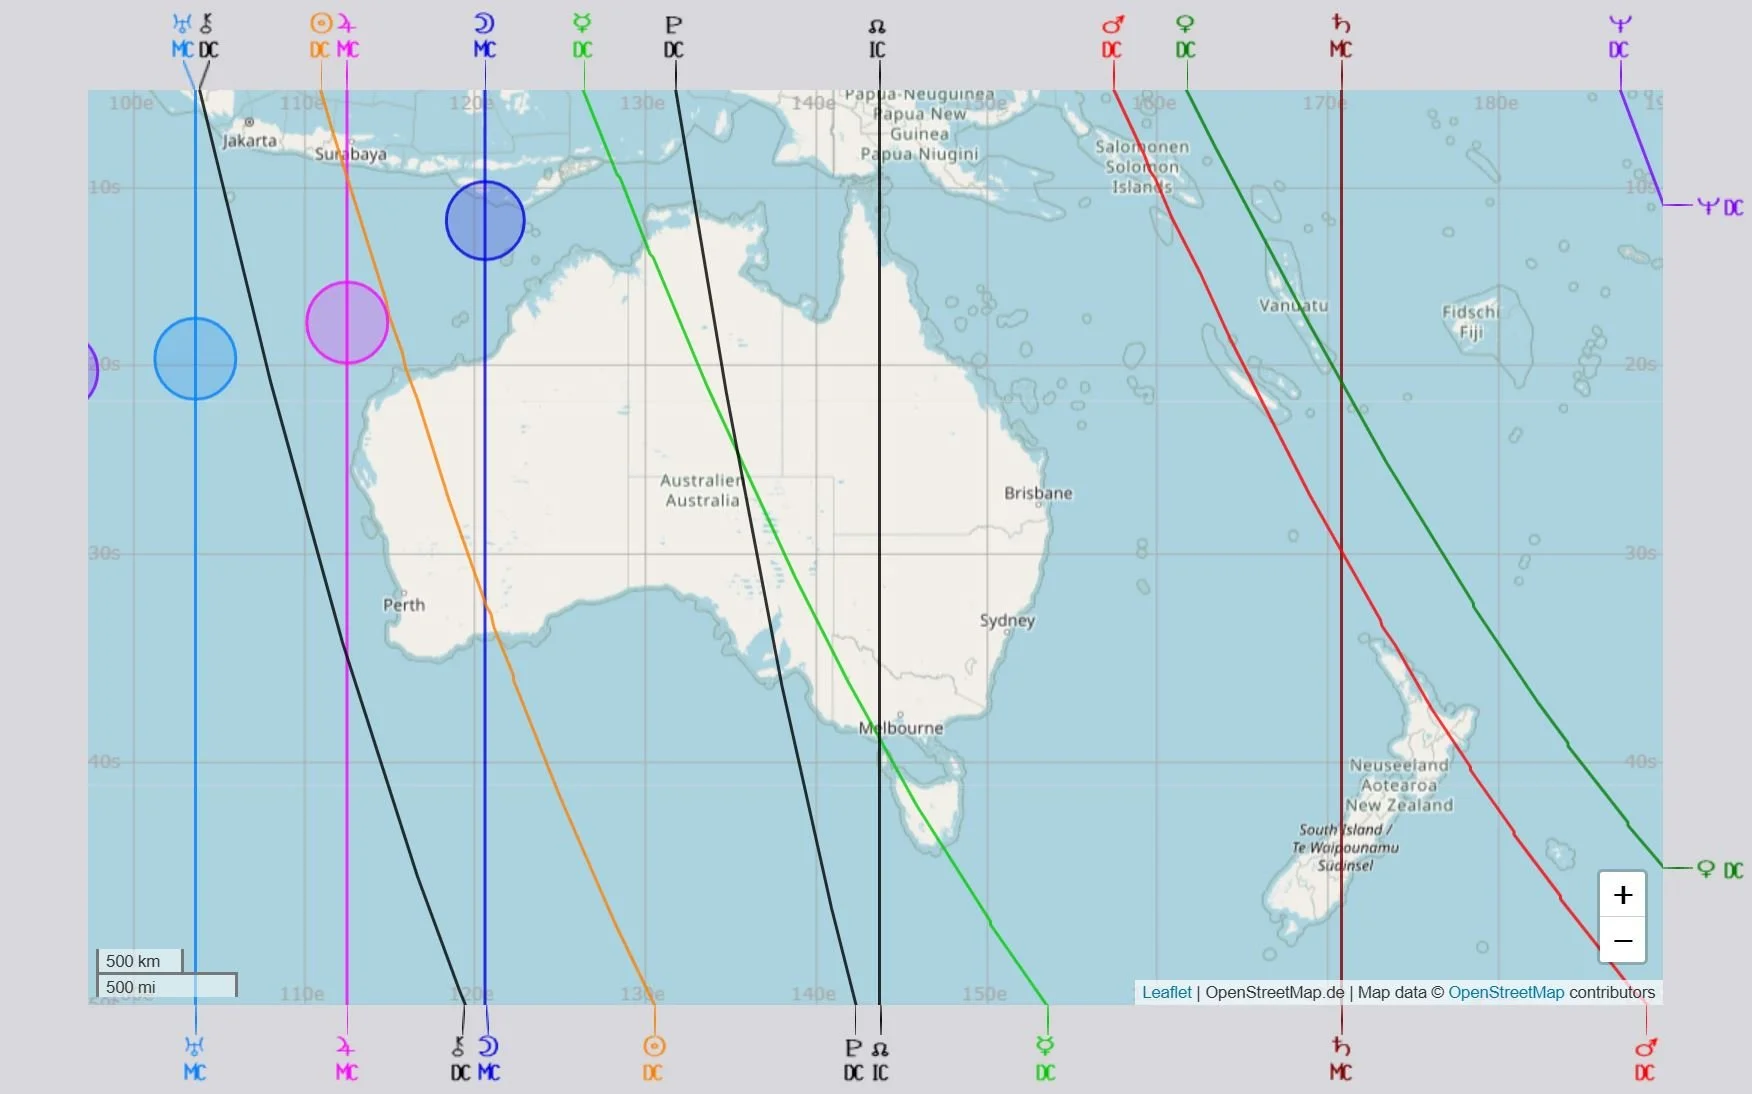
My ACG map of Australia with false hour of birth (11:25 am)
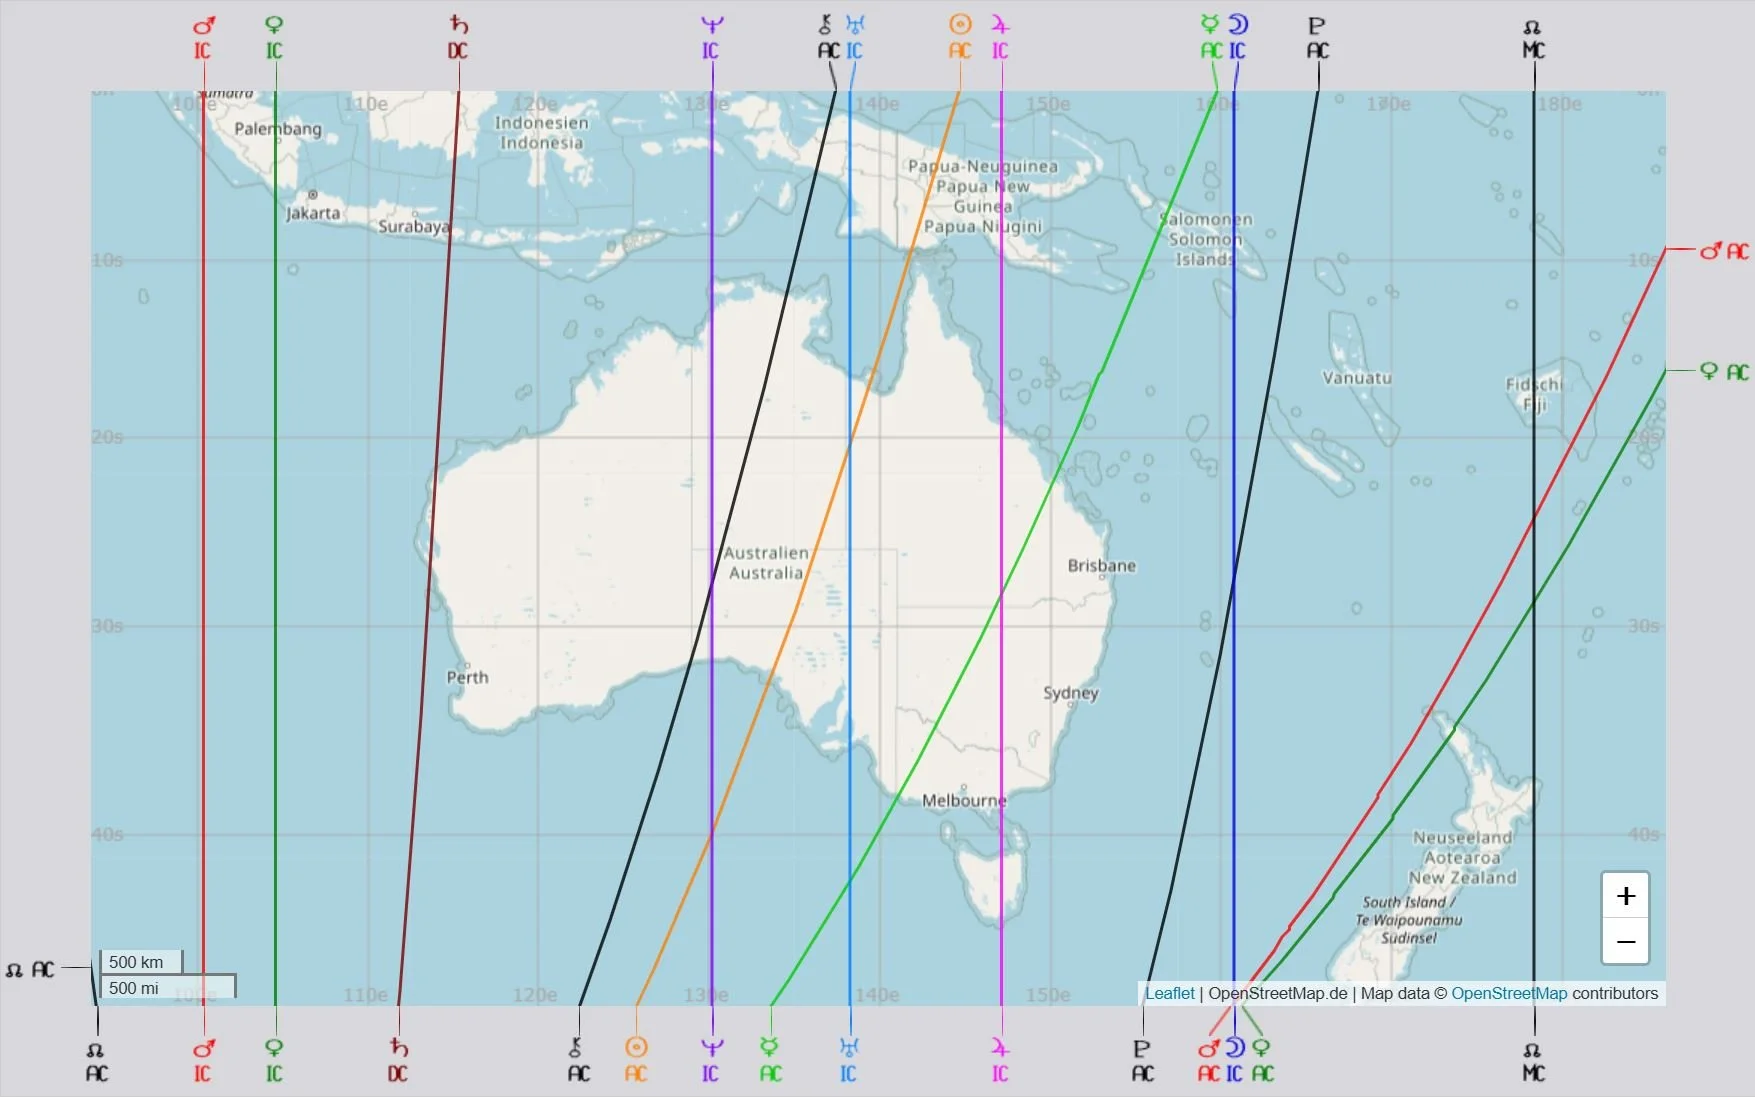
With the correct information (09:05 am)
List of accurate data you need to collect:
Full date of birth – day, month, and year.
Exact time of birth – ideally down to the minute (double-check against official records).
Place of birth – city/town and country, as it was at the time of birth.
Time zone at birth – including daylight savings adjustments if applicable (usually auto-calculated by software, but good to confirm).
Source of information – whether from an official certificate, family records, or rectification (noting how reliable it is).
Step #2 choose your mapping tool + open your birth chart aside
Once your birth data is accurate and ready, the next step is selecting the right tool to generate your astrocartography map. There are both professional software options and free online resources. Each has its strengths, and the best choice depends on where you are in your astrology journey.
If you are just a beginner and willing to use locational astrology as a tool for yourself, it’s more than fine to use free resources online. If you are willing to become a full time astrologer, choosing a software is advisable but not entirely necessary. Yet, it’s a fact that a professional software will save you a lot of time, especially when using advanced techniques. They can be connected manually as well, but it is a visually distorting process if this makes sense. All in all, don’t rush yourself to purchase a program out of pressure. Especially in this stage of your learning.
FREE RELIABLE AND ACCURATE ONLINE MAPS THAT YOU CAN ACCESS
The most common one, and which I used for photos on example above - AstroClick Travel by Astrodienst
For beginners, Astro.com is the most reliable and widely used resource. Their “AstroClick Travel” option is straightforward: you enter your birth data, and the site generates a world map with your planetary lines clearly drawn. Keep in mind that descriptions when you click on lines are generalized, meaning the same description of the same lines apply to everyone, so they are irrelevant.
Second best is Astro-seek’s astrocartography map.
This tool doesn’t let you click directly on a planetary line, but it does give you the option to choose between zodiacal and in mundo systems. The neat part is that when you click on any location on the map, it automatically switches you to a relocation chart for that specific place, giving you a deeper look at how your chart expresses there.
Basically, you can use both tools together. AstroClick Travel is great for zooming in on its scalable map, while Astro-Seek works best for detailed relocation charts. Just a heads-up: when you’re practicing with both, stick to the zodiacal system, because on Astro.com you can’t switch to in mundo.
We’ll go into a separate lesson dedicated to showing you exactly how to use these two tools, step by step. The goal is to help you feel confident navigating both platforms and to understand which one aligns best with your style and needs. And it doesn’t stop there; as new, reliable free resources for astrocartography emerge, this list will be updated so you always have access to the best options. Whenever something new is added, you’ll also receive an email to keep you informed, making it easy to stay up to date.
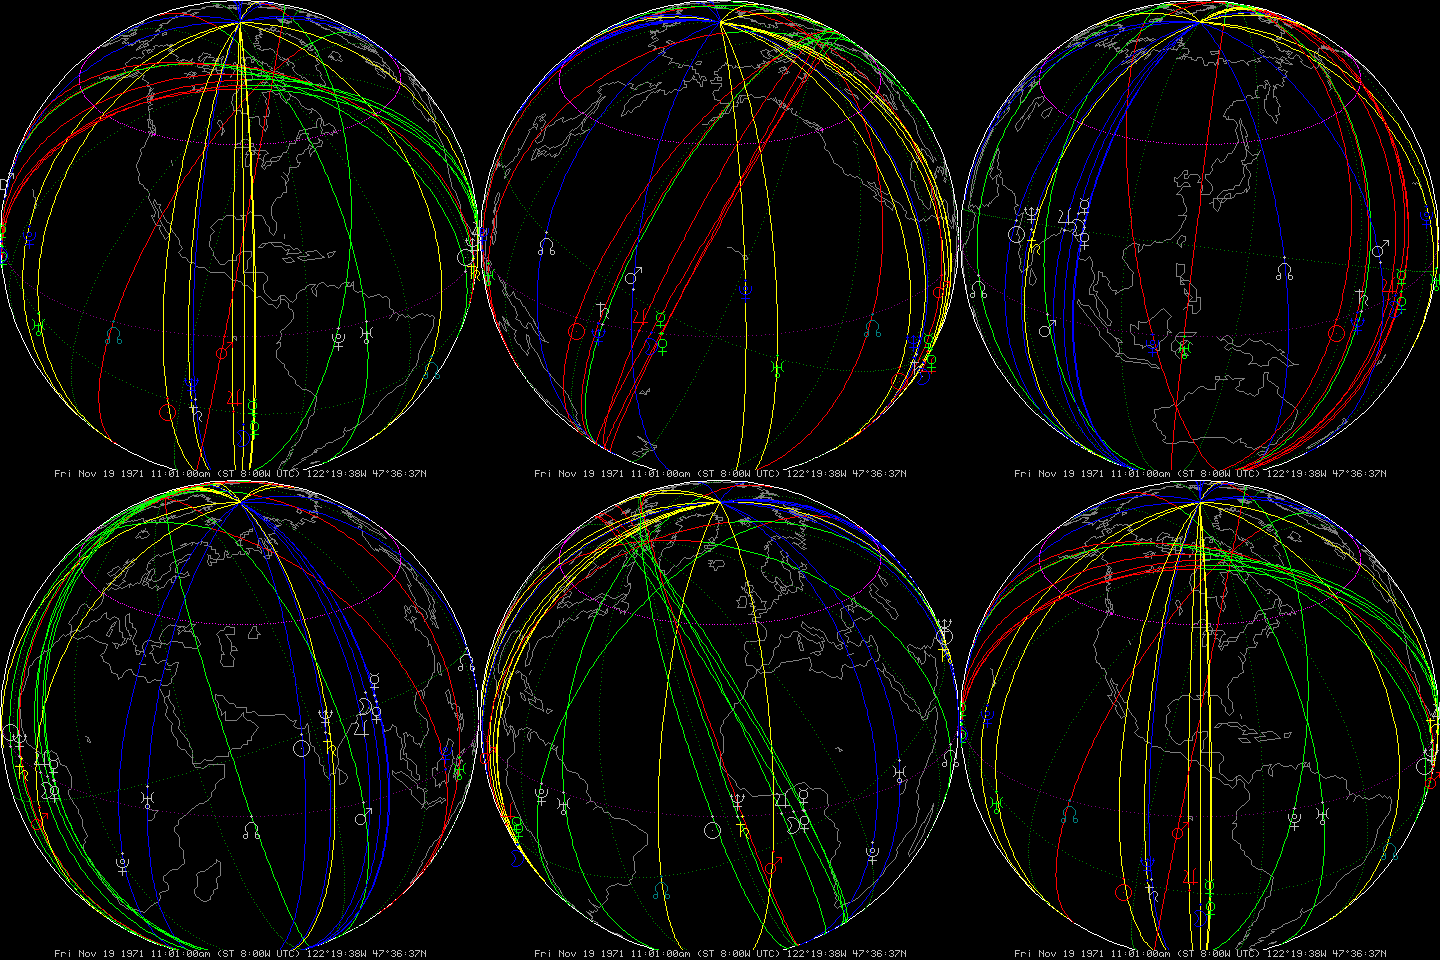
Finally, we have Astrolog, which is a free, open-source software that’s been around since 1991, and over time many versions have built many features. Astrolog can render astrocartography of the world. It supports mapping of planetary lines (where planets ascend, descend, culminate etc.) across the globe.
It also offers a 3D globe and perspective view, so you can actually see how the lines curve across the Earth rather than being limited to flat map projections. On top of that, the software supports a wide range of fixed stars, asteroids, and multiple house systems. This means you can expand your astrocartography work beyond just planets and angles, bringing in additional points that many astrologers find valuable. It adds real depth to your exploration and makes it a practical step up from free websites. It’s an excellent starting point and easy to download, experiment with, and learn from.
So, key difference between AstroClick Travel + astro-seek astrocartography free maps and Astrolog, is that you can add layers that these free online tools simply don’t offer. That makes it a fantastic “sandbox” if you are someone who wants to experiment with locational techniques beyond the basics.
PAID RELIABLE SOFTWARE
#1 SOLAR FIRE V9 by Astrolabe INC - US$360
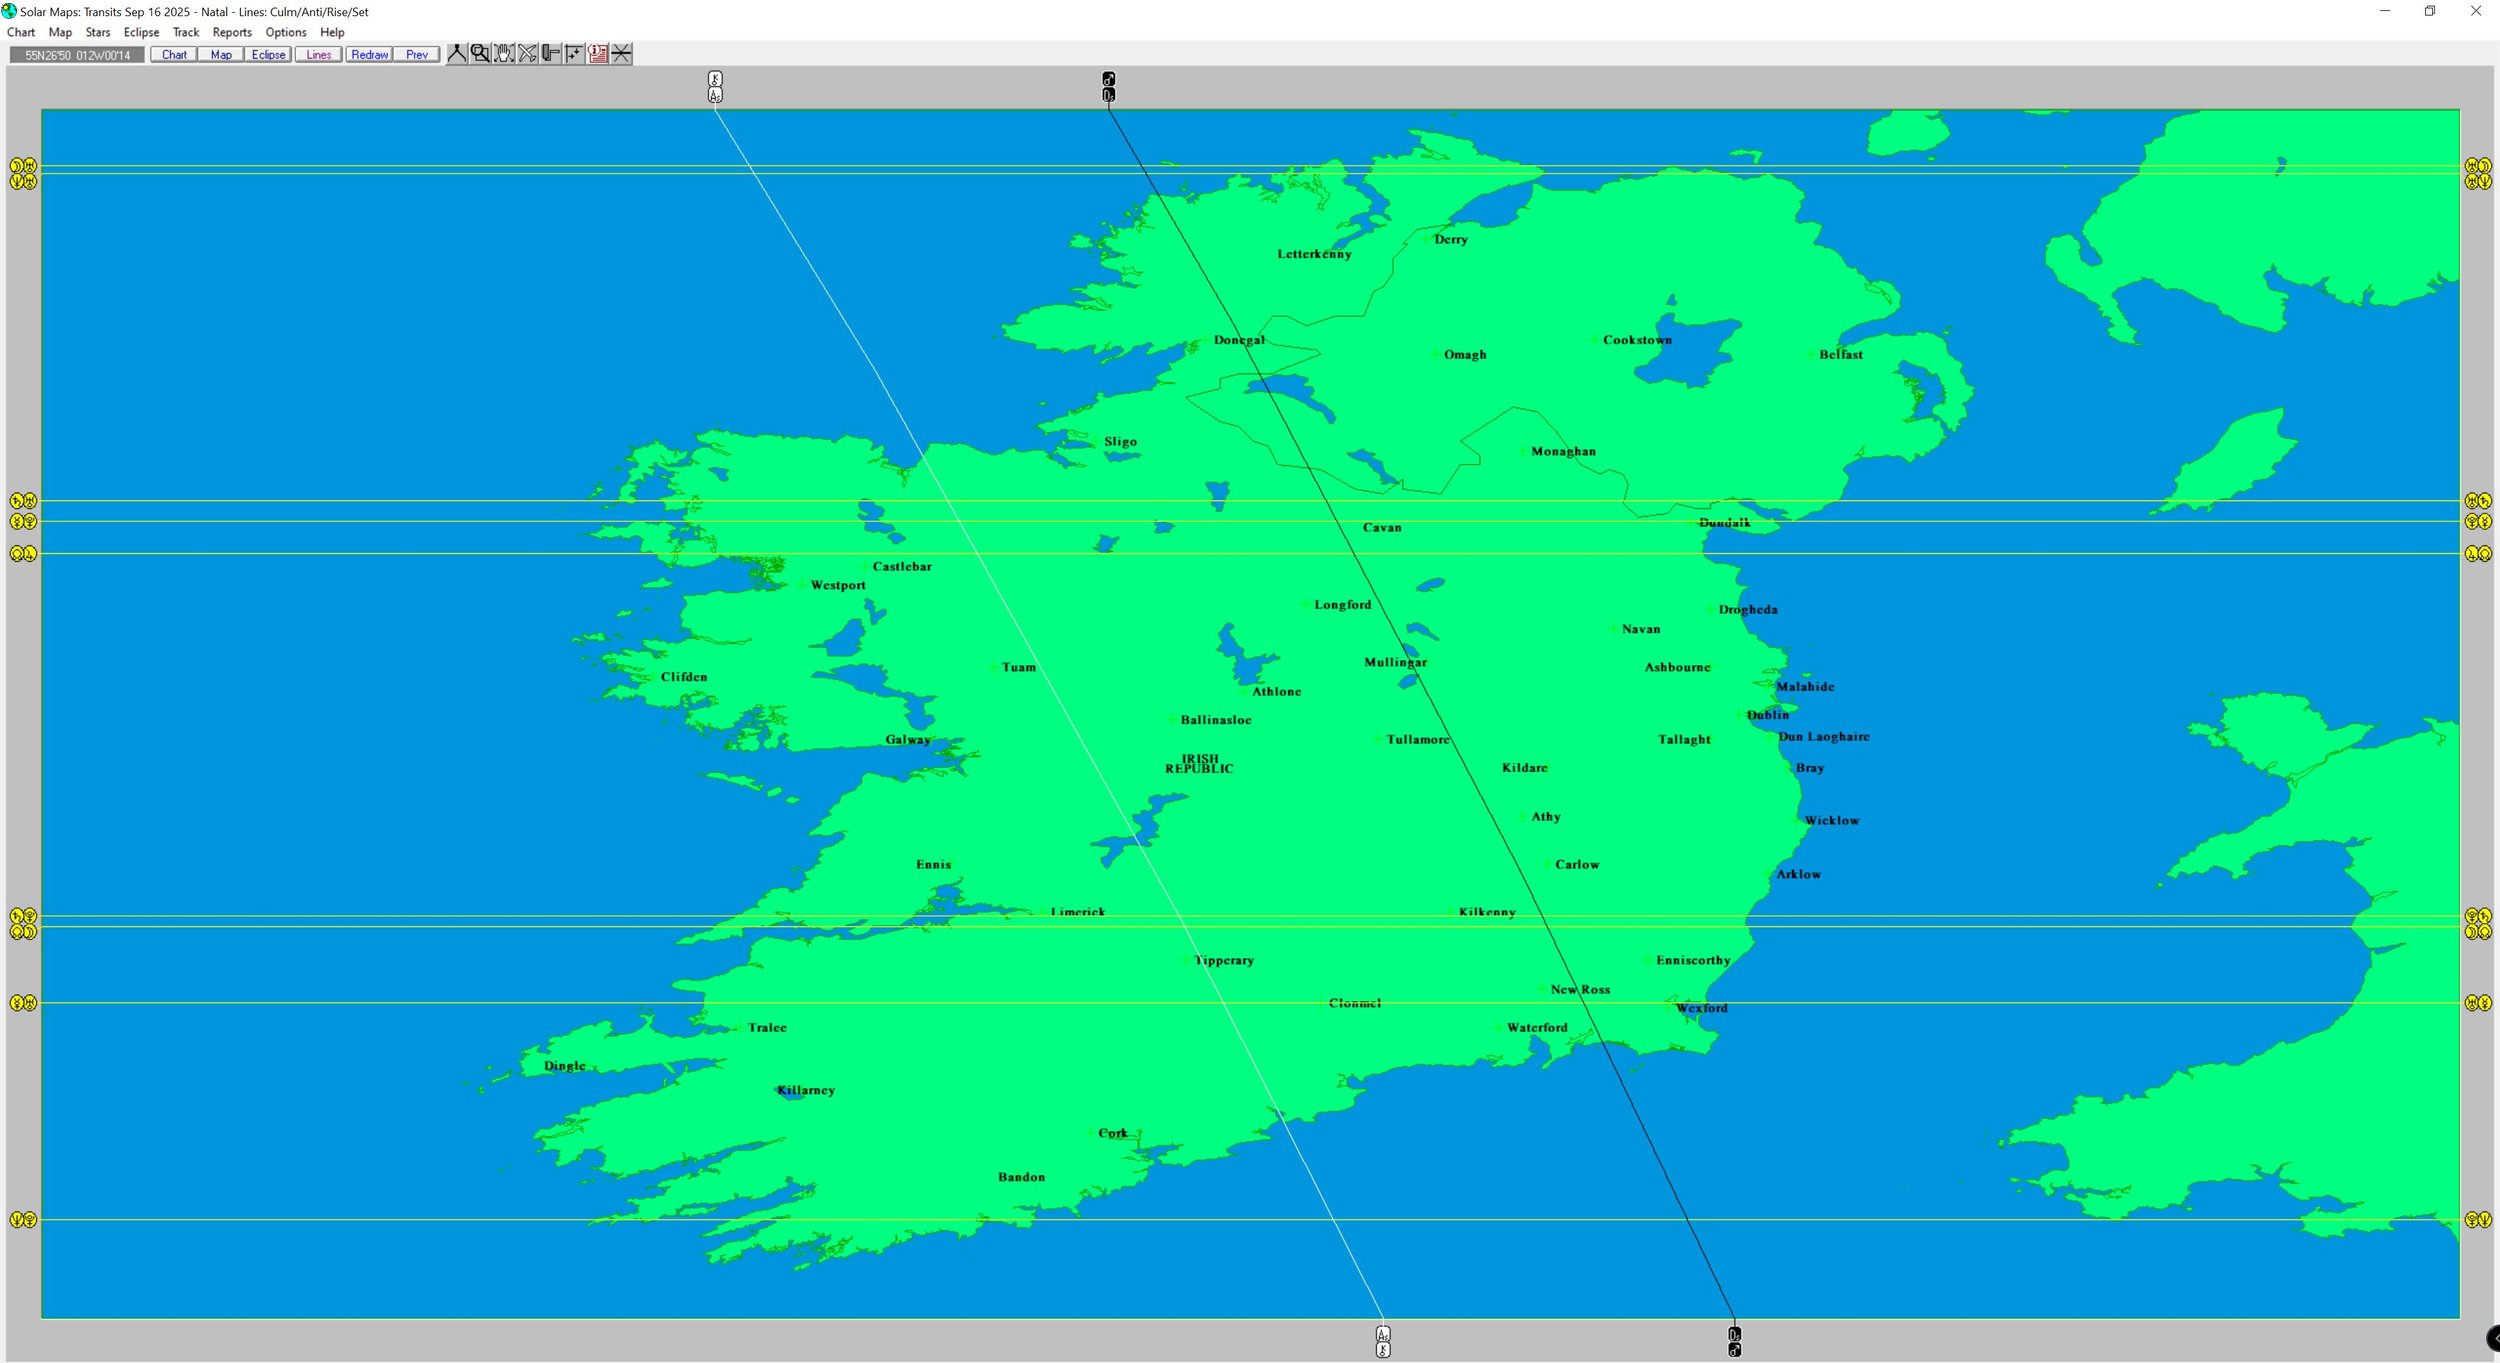
Pros of Solar Fire
Along planetary angular lines, you can also display visible latitude paran lines, local space lines, midpoints, cyclocartography lines and more along with relocation charts all in one system. This makes it possible to go from a global overview straight into the chart of a specific location without switching programs
You can generate reports of all lines affecting a certain place with a measured orb of influence with just one click
Relocation charts on demand! You can instantly cast a natal chart relocated to any city or coordinates. This is essential if you’re working with clients who want to compare “living here vs. there” and need to see how houses shift if you plan to do readings via live calls, if you ever decide to become a full time reader (or a casual one).
You can control which planets and points appear on the maps. If you want only luminaries and benefics, or you want to overlay Chiron, asteroids, or fixed stars, you can. The ability to highlight or hide points helps keep maps clear when presenting to clients.
Unlike stand-alone ACG software, Solar Fire links relocation with timing: you can combine transits, returns, and progressions on the map. This allows you to see not only where but also when a move might be more favorable. This is not possible on free maps.
Cons of Solar Fire
The mapping visuals are functional, but not particularly modern. Compared to sleek, web-based mapping tools, Solar Fire’s maps feel dated. They work, but you’ll notice the software’s age in the interface. Also, for some smaller areas, and even cities of population over 40,000+ aren’t included and you need to manually search the coordinates which can be quite annoying. AstroClick Travel’s scalable map is the prime example of how a functional ACG map should look like.
ACG layers, parans, and settings are tucked behind menus and options that aren’t always intuitive. If you’re new to ACG, it can feel overwhelming until you establish a workflow.
If you’re sharing your screen with a client, the maps aren’t as smooth or visually modern as web-based tools. Resizing windows or switching between charts/maps can look clunky, which can take away from presentation polish.
When working with dense map layers (planets, asteroids, parans all at once), Solar Fire can lag or freeze on average machines. Not ideal if you’re running multiple programs while consulting. It can also crash and close out of nowhere.
If you’re using Solar Fire on multiple devices (say, a desktop at home and a laptop while traveling), you can’t just sync your files seamlessly. This can be annoying if you do astrocartography consultations on the go.
Not available for Mac users, only for Windows.
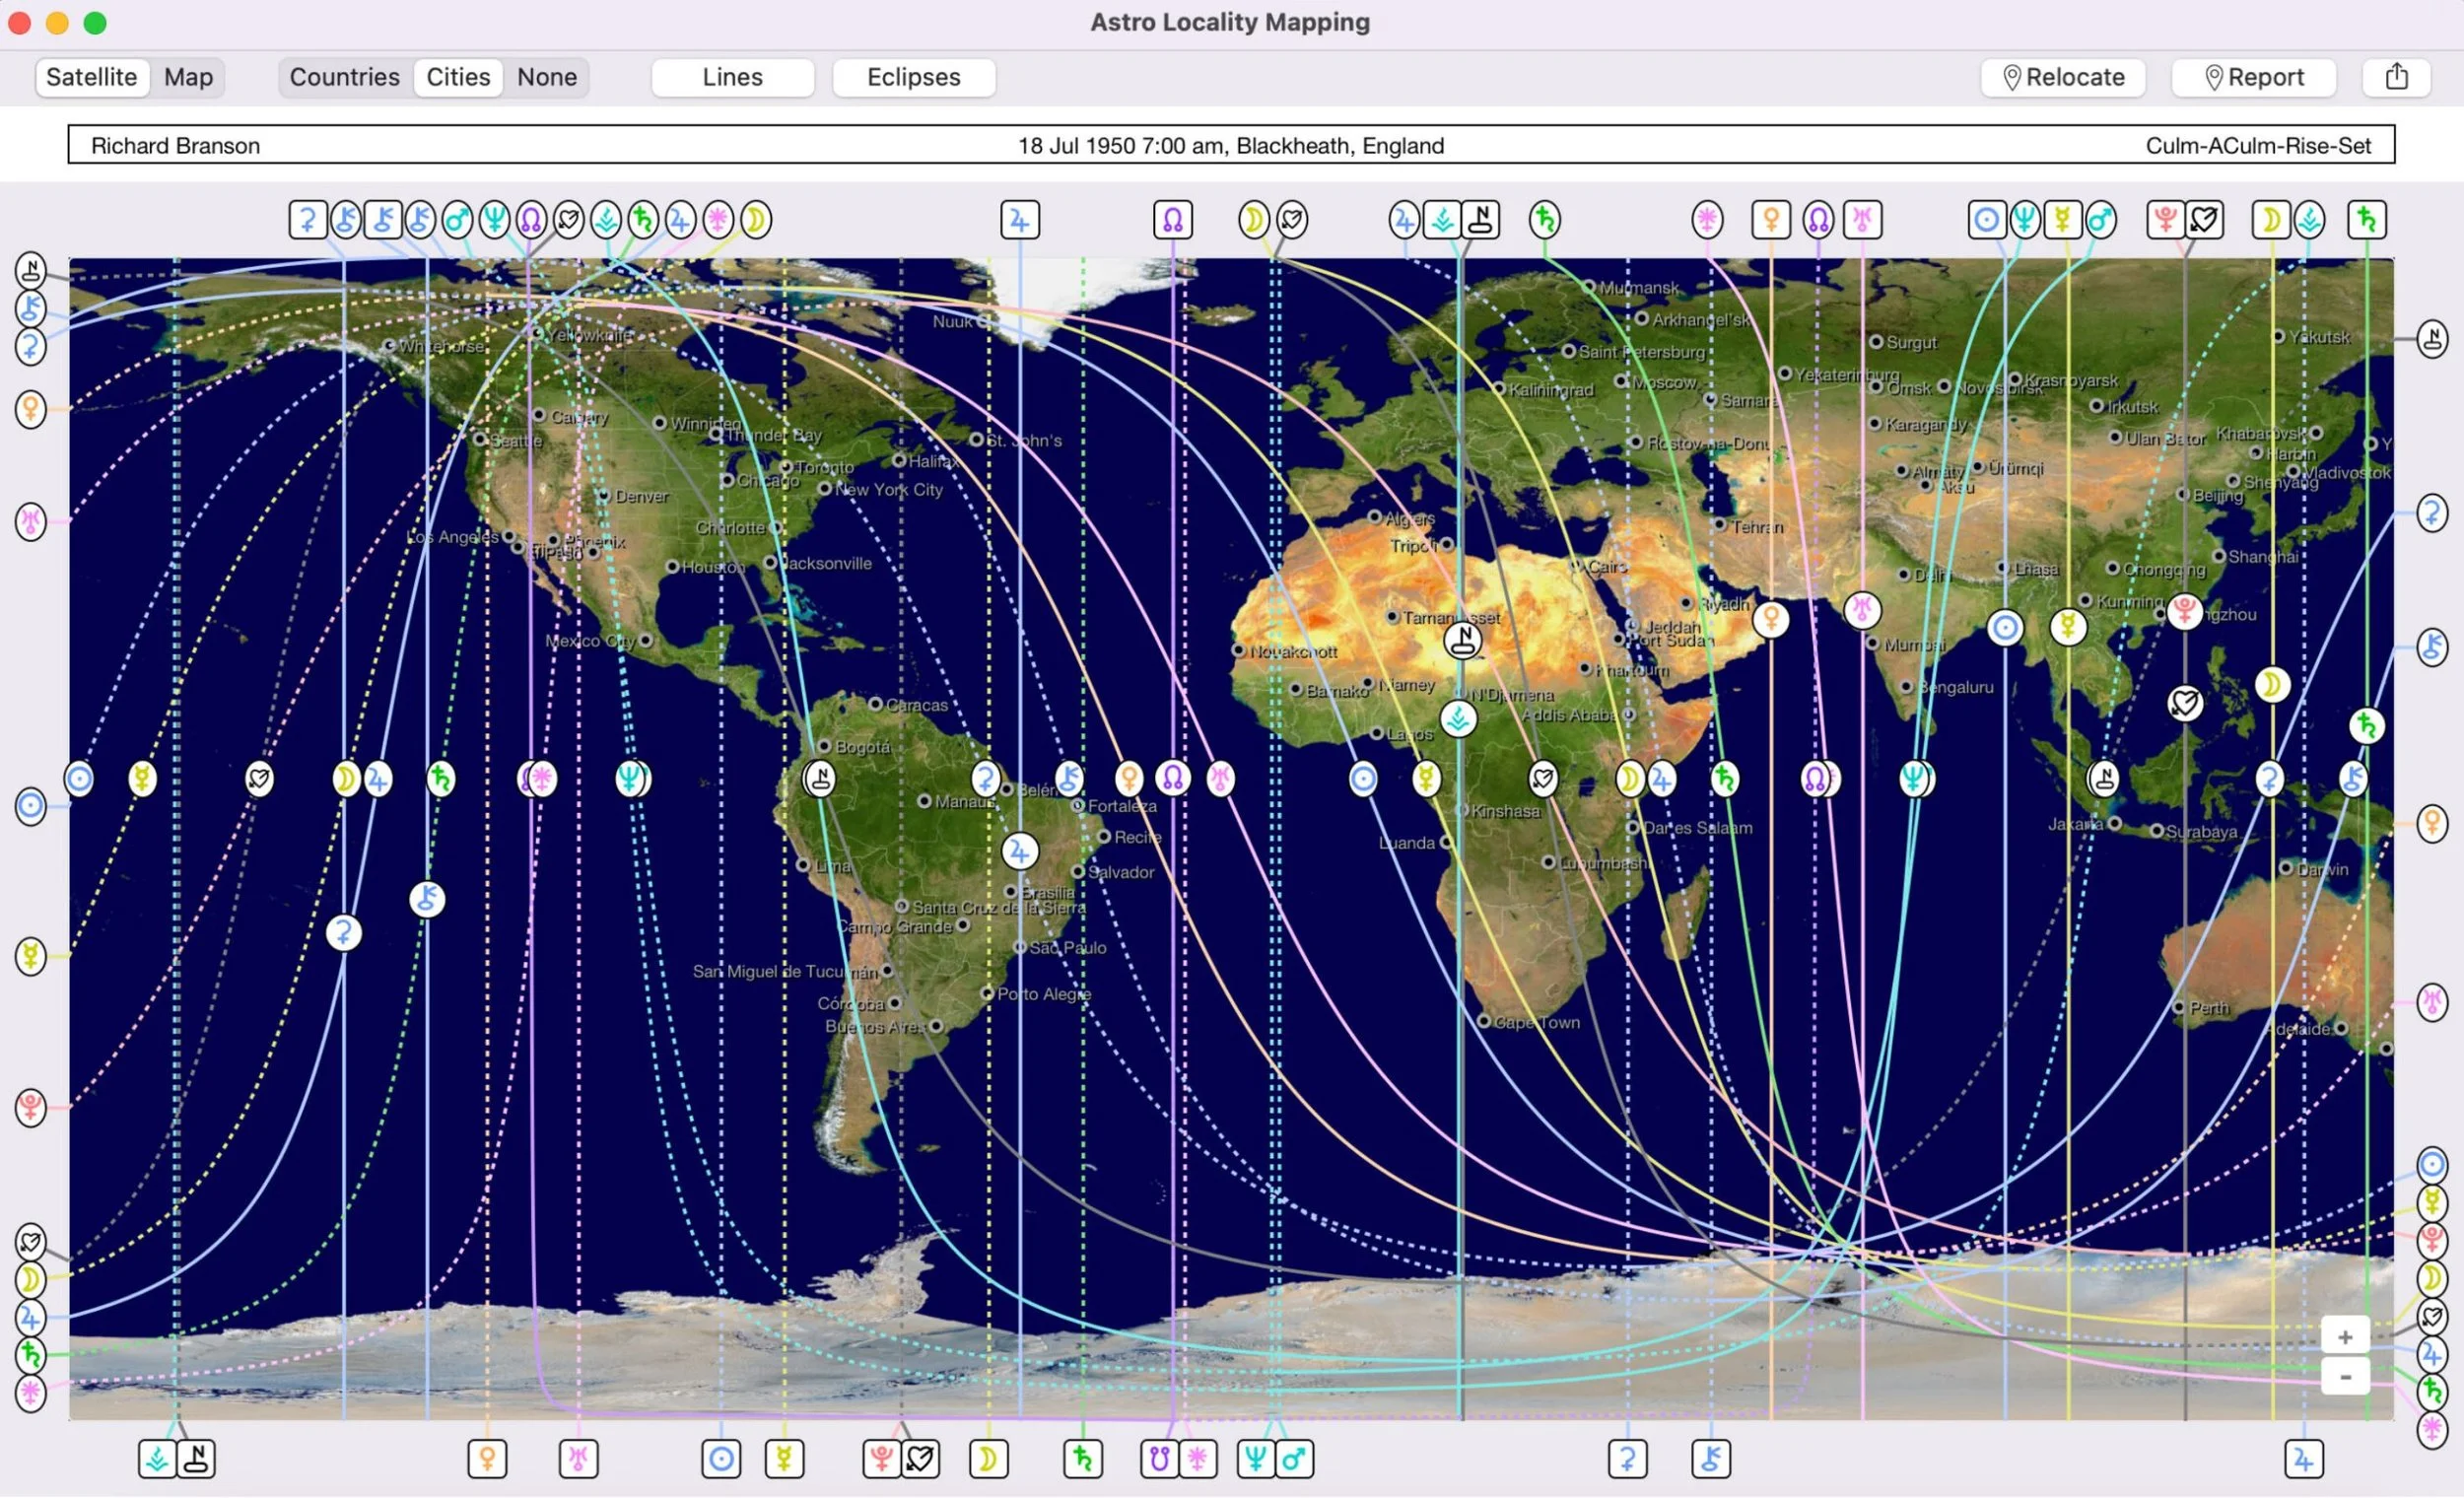
Public image taken from Astro Gold website for representation services
Prices are different depending on device / operating system:
Astro Gold for macOS (desktop) is priced at US$249.99.
On Android, Astro Gold is around US$24.99 in Google Play.
On iOS, it has a free core version, then gold-level features via a lifetime in-app purchase, or subscription options: about US$7.99/month, US$59.99/year, or US$99.99 for lifetime unlock.
Astro Gold is like the lightweight, streamlined ACG tool for astrologers on the go, excellent for mobile access, basic planetary line work, and quick client checks. But for deep locational astrology with latitude parans and midpoints, detailed map control, and professional-grade customization, it’s not a replacement for Solar Fire. Compared to Solar Fire’s hefty price tag, Astro Gold is more accessible, making it appealing for astrologers who want ACG tools without a major upfront investment.
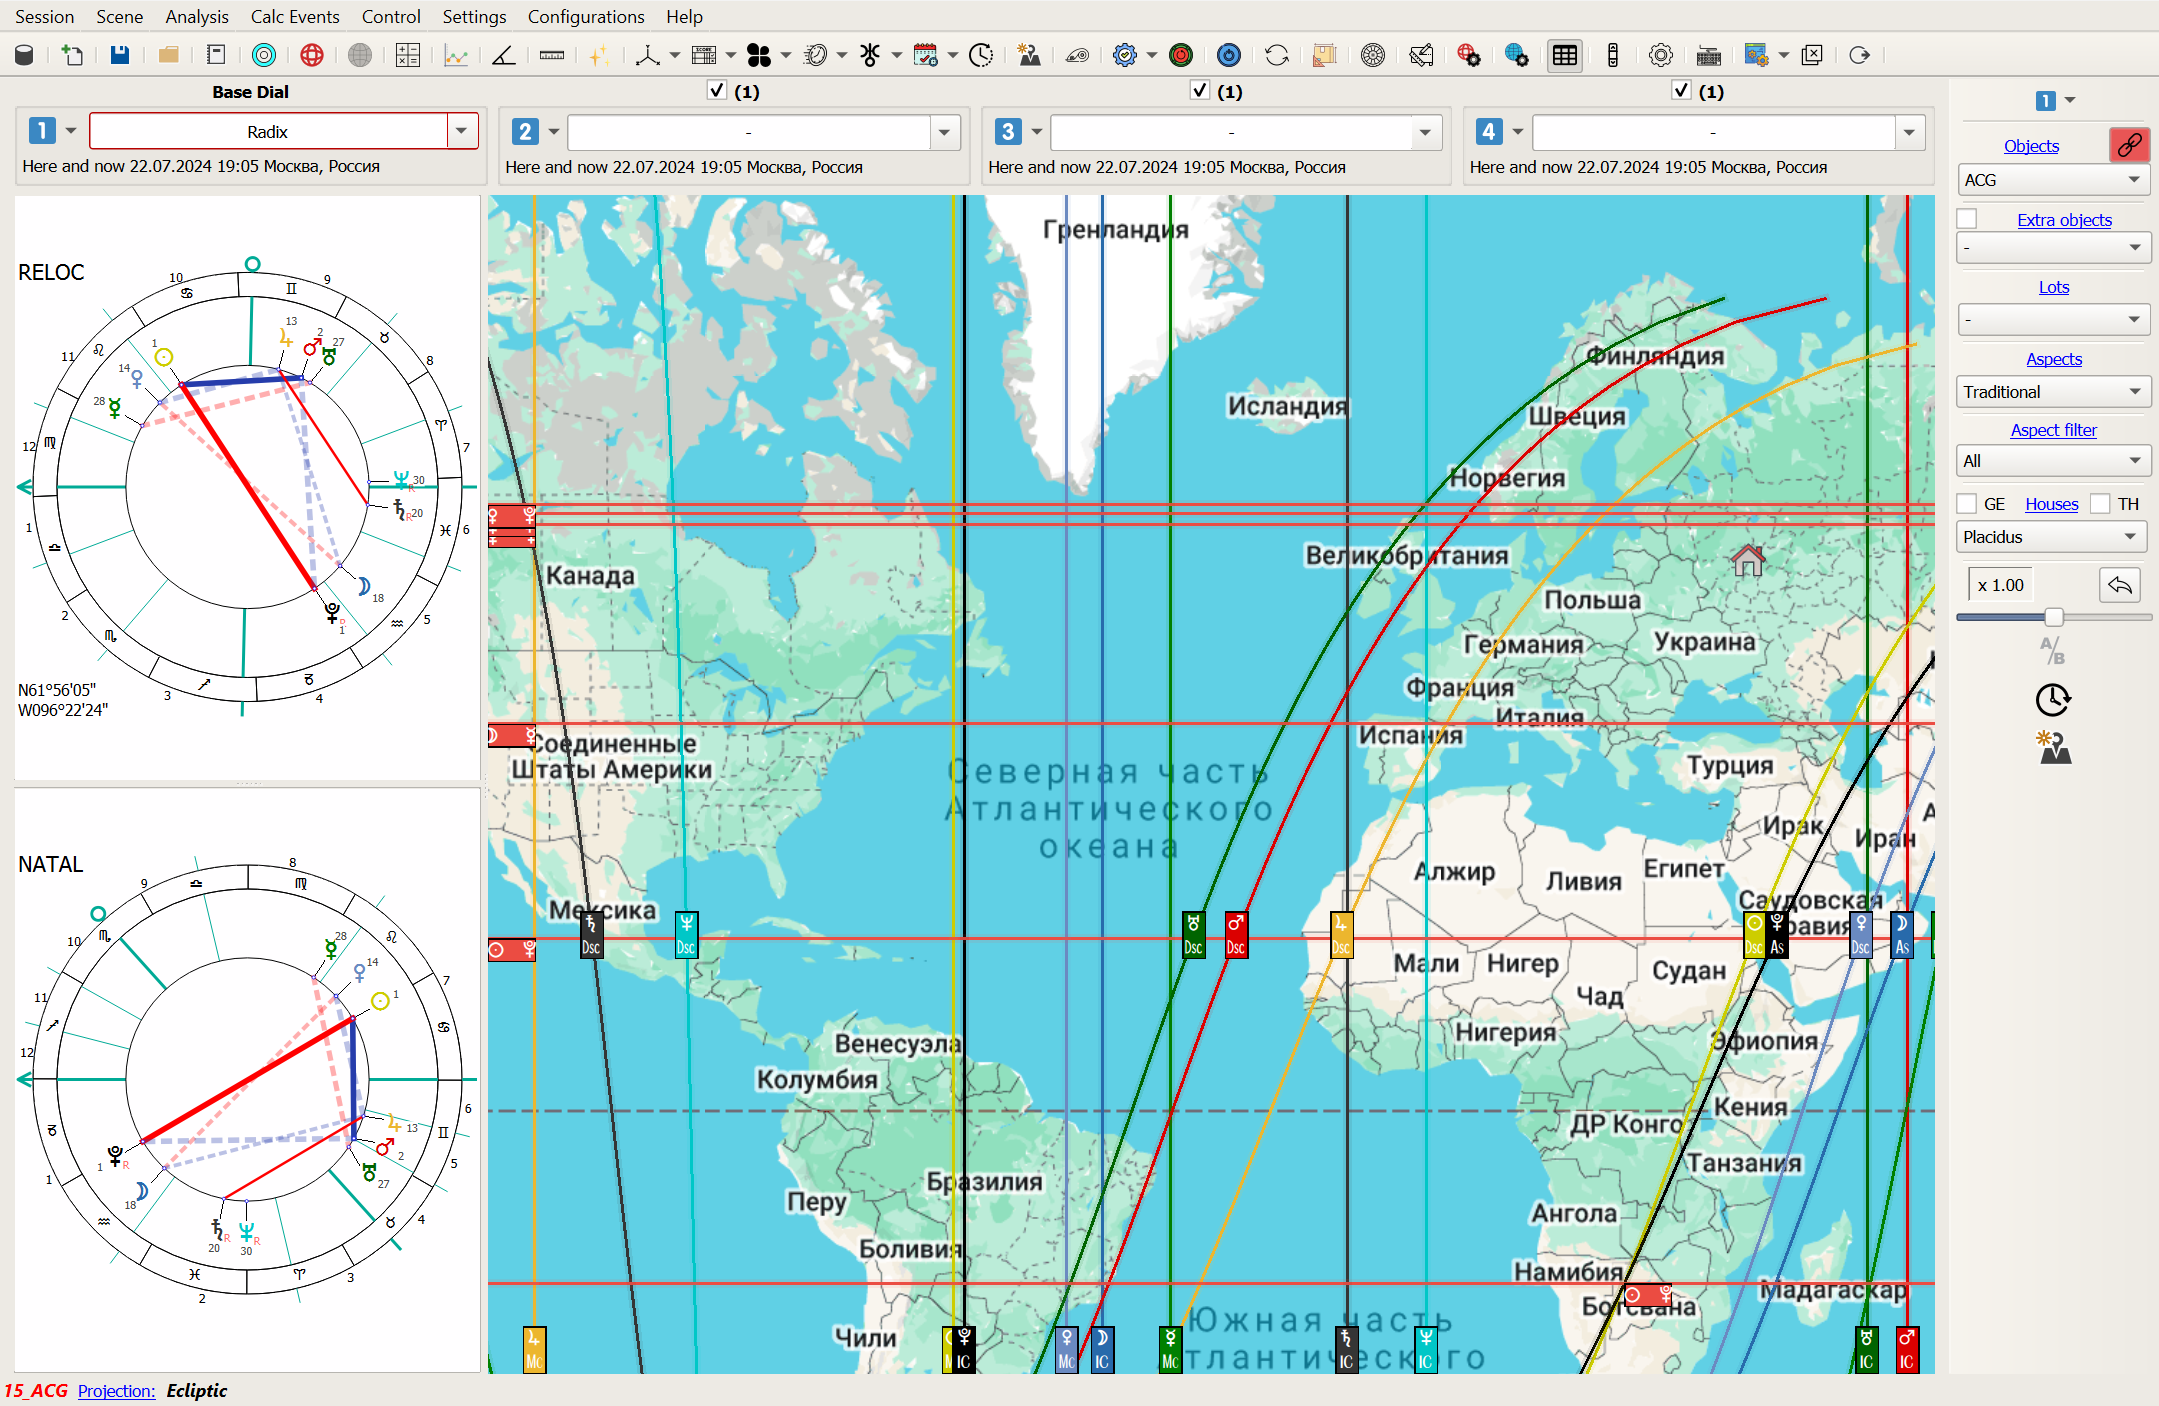
Public image taken from astro-zeus.com for representation services
ZEUS is an astrological software ("astroprocessor") intended for professionals. It supports Classical Western Astrology, Traditional (Ancient/Medieval/Arabic) astrology, Uranian / Hamburg work, Local Space / ACG, and more.
It is developed to run on Windows and macOS.
Biggest downfall of Zeus is that the software is subscription based, which can end up more expensive than Solar Fire and Astro Gold combined over the years: After a 14-day demonstration period, continued use requires a subscription., you either choose to pay a six-month subscription for US$79 or a one-year subscription for US$136.
But overall, ZEUS is rich in control and very good for any astrologer doing deep work!
Yet keep in mind that ZEUS software assumes users already know astrological technique well. It gives tools but doesn’t always give beginner-friendly explanations of what every line or feature means.
Why all this precision matters?

Imagine you are hiking a mountain…
The moment you were born, each planet was in a very specific relationship with Earth’s horizon and meridian. Those angles are projected outward as lines across the globe. If your birth data is off, the map no longer reflects your lived reality.
If your birth data is even slightly off, the map you use no longer matches the reality of your chart. It’s like trying to hike with a compass that’s a few degrees off. For a short walk, it might not matter much. But when you extend that error across the mountain, you could end up in a completely different place than intended and miss your targeted mountain peak.
A tiny inaccuracy can change which cities or regions fall under a planet’s influence, altering the insights you draw from your astrocartography.
Step #3 - launching your (first) map
Testing & observing time! You probably by this point already opened your first map so far, but the goal of this step is to launch it so you don’t approach it with overwhelm.
For a first map, Astro.com works perfectly well. Once you have your data entered, the software will project your planetary lines across a world map. This is your playground.
At first glance, the map looks like someone spilled spaghetti all over a globe. But it’s actually clean geometry! Each line represents where a planet was rising, setting, culminating, or at the nadir at the moment you were born.
ASC (Ascendant) lines: where that planet was rising on the eastern horizon.
DC (Descendant) lines: where it was setting in the west.
MC (Midheaven) lines: where it was directly overhead.
IC (Imum Coeli) lines: where it was at the bottom of the sky.
That’s it. Four angles, each planet drawn out across Earth. On astro.com, you will see a total of 48 major lines, with Chiron and North Node/South Node lines on top of each other.
Here’s a quick ‘formula’ for a quick removal of the mess once you see the map: certain planet + certain angle = conjunction.
Example: Planet Mercury + ASC (Ascendant Angle) = Mercury ASC line.
In astrology, a conjunction occurs when two or more planets appear very close together in the same zodiac sign, usually within 0–10 degrees of each other. On a map where the line passes, the exact conjunction is highlighted at 0 degrees. This doesn’t mean that you need to be directly on the line to feel the influence, simply because of that orb of influence we just mentioned. This is why distance is measured, which will be explain in detail in some of the following lessons.
PRACTICAL EXERCISE
Redraw your entire astrocartography map
Goal: to internalize your map by physically drawing it yourself. Bigger paper = bigger focus. What you will need: (best) open AstroClick Travel free map.
Step 1: prepare your space
Get a large sheet of paper (A3 or bigger).
Gather pencils, colored pens, ruler, and eraser.
Step 2: sketch the world
Draw a rough world map covering the main continents.
Focus on general shapes, don’t worry about perfect geography.
Step 3: mark the key angles (just mark it the paper, like a compass so you can orient)
ASC (left), DC (right), MC (top), IC (bottom).
These will help anchor your planetary lines.
Step 4: redraw all planetary lines (use colors)
Take your reference map and carefully copy every planetary line onto your new large map.
Include all planets and their angles, just like on the free map.
Label each line with its glyph and line type (MC, IC, ASC, DC). Assign a different color for each planet. This helps visual memory and makes it easier to read at a glance.
Until the next lesson xx
